整合UEditor图片上传模块为上传插件
发布于:2016-11-05 | 分类:web development
UEditor是百度web前端研发团队fex-team开发的所见即所得富文本编辑器,具有轻量,可定制的特点。本文结合稻壳互联发布的博文提供的思路,将UEditor的文件/图片上传功能整合为上传插件,并对其使用方法做简要说明。
插件代码
思路:初始化一个隐藏自身、仅带有文件/图片上传按钮的UEditor,并监听其文件/图片上传组件的插入动作;然后在目标对象的单击事件中打开文件/图片上传对话框。
/**
* 基于ueditor自定义上传组件
* 需要在ueditor.all.js文件me.execCommand('insertHtml', html);之后增加:me.fireEvent('afterUpfile', filelist);
*/

(function($) {
    $.fn.ueditor_upload = function(options) {
        // 默认参数
        var defaults = {
            editorid: null,        // 百度编辑器容器
            uploadtype: 0,         // 0 图片 1 文件
            title: '选择文件...',  // 选择文件对话框的标题
            success: function() {} // 上传完成后的回调函数
        };

        // 初始化ueditor,并隐藏之
        function getEditor(editorid, tool) {
            return UE.getEditor(editorid, {
                isShow: false,
                focus: false,
                enableAutoSave: false,
                autoSyncData: false,
                autoFloatEnabled: false,
                wordCount: false,
                sourceEditor: null,
                scaleEnabled: true,
                toolbars: [
                    [tool]
                ]
            });
        };

        var o = $.extend(defaults, options || {});
        var me = null; // 当前被点击的对象
        if (o.uploadtype === 0) { // 上传图片
            var listener = 'beforeInsertImage';
            var dialogtype = 'insertimage';
            var tool = 'insertimage';
        } else { // 上传文件
            var listener = 'afterUpfile';
            var dialogtype = 'attachment';
            var tool = 'attachment';
        }

        // 初始化编辑器
        var editor = getEditor(o.editorid, tool);

        // 根据上传类型注册监听事件
        editor.ready(function() {
            editor.addListener(listener, function(t, args) {
                if (typeof(o.success) == 'function') {
                    o.success(me, args); // 回调函数
                }
            });
        });

        // 点击对象弹出上传对话框
        $(this).click(function(event) {
            me = $(this); // 获取被点击的对象,作为回调函数的参数
            var dialog = editor.getDialog(dialogtype);
            dialog.title = o.title;
            dialog.render();
            dialog.open();
        });
    }
})(jQuery);
参数说明
初始化插件时接受的参数为一个对象,其属性为:
-
editorid: string 初始化UEditor编辑器的容器 -
uploadtype: int 上传类型,默认为图片(0)或者修改为文件(1) -
title: string 上传对话框的显示标题 -
success: function 上传文件成功后的回调函数,第一个参数为触发文件上传的自定义对象,第二个参数为上传成功的文件信息数组:[{url: // 新生成的文件名, alt: // 原始文件名}, {}, ...]
使用示例
以下示例在同一页面下多次使用此插件实现不同栏目图片的上传:
-
按照UEditor的使用说明引入必要的js文件
<script src="/js/ueditor/ueditor.config.js"></script> <script src="/js/ueditor/ueditor.all.min.js"></script> <script src="/js/ueditor_upload.js"></script> -
HTML结构
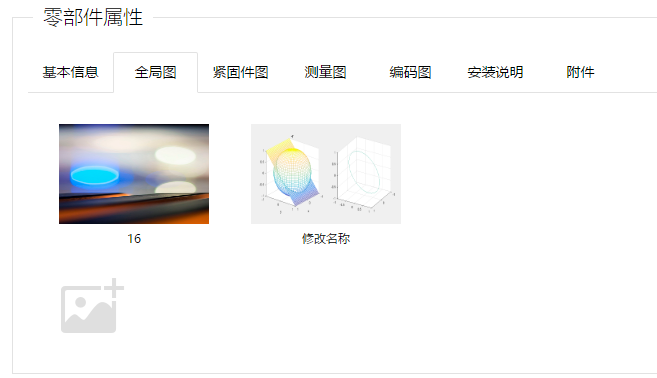
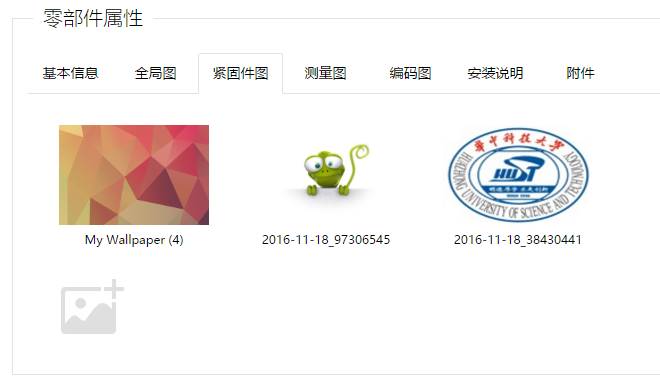
<!--加载编辑器--> <textarea id="uploadImgEditor" class="hidden"></textarea> <!-- 选项卡:全局图 --> <div class="layui-tab-item"> <div class="upload_img_wrap"> <div class="addpic"> <img class="upload_img_btn" src="/images/product/addpic.png" alt="添加图片"> </div> </div> </div> <!-- 选项卡:紧固件图 --> <div class="layui-tab-item"> <div class="upload_img_wrap"> <div class="addpic"> <img class="upload_img_btn" src="/images/product/addpic.png" alt="添加图片"> </div> </div> </div> <!-- 选项卡:测量图 --> <div class="layui-tab-item"> <div class="upload_img_wrap"> <div class="addpic"> <img class="upload_img_btn" src="/images/product/addpic.png" alt="添加图片"> </div> </div> </div> -
调用插件
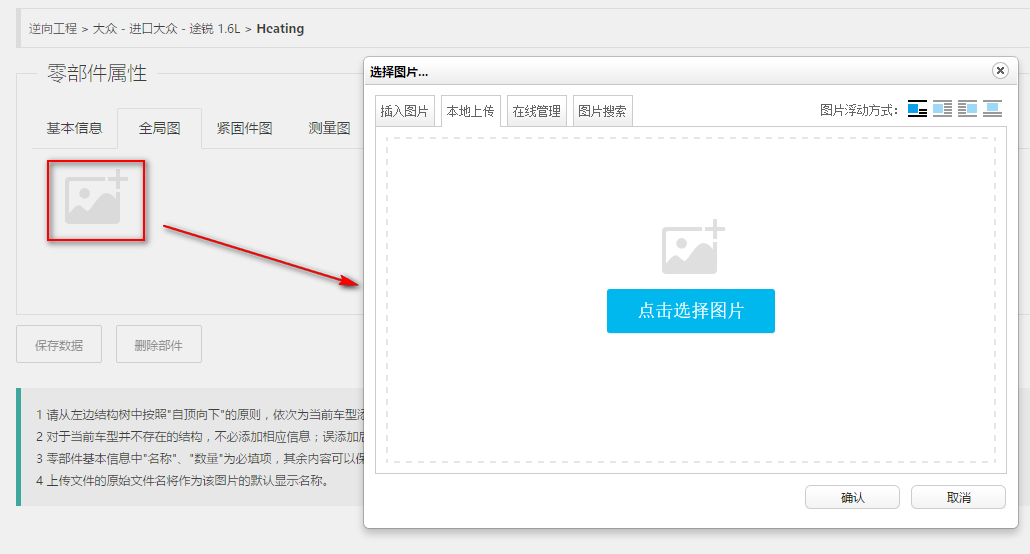
$('.upload_img_btn').ueditor_upload({ editorid: "uploadImgEditor", uploadtype:0, title:"选择图片...", success: function(obj, res){ var imageHtml = ''; for(var i in res){ imageHtml += '<div class="thumblist"><img src="'+res[i].src+'" alt="'+res[i].alt+'"><div class="del_upload"></div></div>'; } $(obj).parent(".addpic").before(imageHtml); } }) -
效果示例